 |
 |
|
|
Design
a Virtual Bridge...
Learn about Engineering!
|
| West
Point Bridge Designer Tutorial |
| In
this tutorial, we'll use the West Point Bridge Designer 2005
to design a steel truss bridge. Before we can start, you'll need to
download the WPBD 2005 software and
install it on your computer. If you are using WPBD 2006 or 2007, the procedures
described in this tutorial will be exactly the same, but the costs
and required member sizes will be slightly different (since the 2006
and 2007 editions use different cost factors and loads). |
|
| Once the
software is installed, we're ready to begin. Click the Windows
Start button and then Programs. From the Programs
menu, choose West Point Bridge Designer 2005. Finally
select WPBD2005.exe to run the program. Read the Tip
of the Day and click the Close button. On
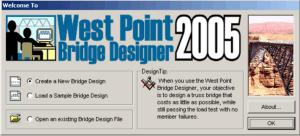
the Welcome screen, ensure that Create a New Bridge
Design is selected (as show at right) and click OK.
At this time, you'll see the Site Design Wizard. |
|
 |
| On
the first screen of the Site Design Wizard (Step 1), take a moment
to familiarize with the design requirement and the project site, then
click the Next button. |
|
| In Step
2, we'll make some important decisions about how the bridge
will be sited. To keep this tutorial simple, we'll choose the
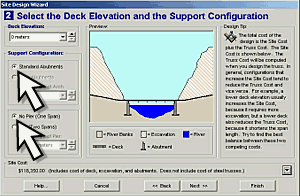
simplest possible site configuration. From the Deck Elevation
list, choose 0 meters, which results in the shortest
possible span length. Set the Support Configuration as
Standard Abutments and No Pier, as shown at right.
Note that the Site Cost is displayed near the bottom
of the Wizard. This site configuration has a total cost
of $134,603.00, which includes the costs of the deck, abutments,
and excavation--but not the steel truss (which you haven't designed
yet). If you'd like to see how this number is calculated, just
click the drop-down arrow on the right-hand side. |
|
 |
|
By the way,
if you have any questions about the terminology used to describe
the site configuration--abutments, deck, span, excavation,
etc.--just click the Help button at the bottom of the Site
Design Wizard.
Now click the
Next button to proceed to Step 3.
|
|
| In Step
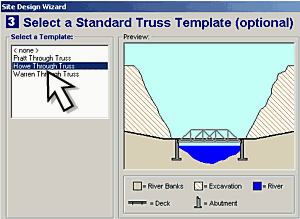
3, we will choose a Standard Truss Template to guide the creation
of our structural model. Using a template is optional, but as
a new or inexperienced WPBD user, you should take advantage
of this tool. For our design, let's try the Howe Through
Truss. Click this item in the Select a Template list
(as shown at right), and click Next.
In Step
4, enter your name in the Designed By box, and enter
"Design 1" as the Project ID. (You can use
the Project ID to uniquely identify each of the designs you
create.)
Now click
Finish to close the Site Design Wizard.
|
|
 |
|


