 |
 |
|
|
Design
a Virtual Bridge...
Win a $10,000 Scholarship!
|
| West
Point Bridge Designer Tutorial |
|
Now that
our structural model is complete, we're ready to test our
design to determine whether or not it can carry the traffic
loads prescribed in the Design Specifications. To start the
test, click the Load Test button on the toolbar.
|
|
|
|
|
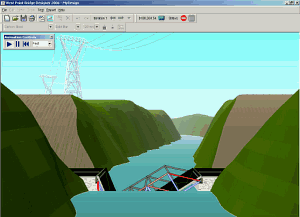
As the
load test begins, we see our bridge as it might look after
it is built. The structure sags a bit, as it begins carrying
its own weight. All that steel and concrete is heavy, but
the trusses do their job well. Then along comes a truck--a
360 kilonewton vehicle representing the largest loading that
this bridge is expected to experience in its lifetime. The
truck moves out onto the bridge and...the structure collapses
into the river. Ouch!
Our design
has failed the load test--but don't worry. Engineering design
is an iterative process. Some trial-and-error is always
necessary to achieve a successful product. If at first you
don't succeed, then go "back to the drawing board" and try
again.
|
|
 |
| To
return to the Drawing board and continue our design, just click the
Drawing Board button. That's the one just to the left of the
Load Test button (shown above). |
|
|
Back on
the Drawing Board, you'll notice that the appearance of the
structural model has changed. Five of the 18 members are now
highlighted in red--indicating
that these members are not strong enough to carry the truck
loading.
|
|
 |
|
To make the
bridge safe, we'll need to strengthen these members. To strengthen
them, we'll need to make them larger. First, use the Select tool
to select one of the failed members by clicking it with the mouse.
|
|
|
(Recognizing
that you would probably need to edit your structural model,
the West Point Bridge Designer has already chosen the Select
tool for you. It's the arrow button on the Design Tools
palette, as shown at right.)
|
|
|
|
|
The selected
member will turn light blue.
Once a member is selected, we can change any of its properties--material,
cross-section, or size. The most effective way
to strengthen a failed member is to increase its size. To
make this change, click the drop-down arrow on the Member
Size list (one the of Member Properties lists on
the lower toolbar), and choose the next larger size--130
mm. Repeat the process for the remaining four failed members.
Select each member, then choose 130 mm from the Member
Size list.
|
|
|
|
| We
have attempted to repair the failed members in our structural model,
but we won't know if the repairs are effective until we run the load
test. So click the Load Test button and (ouch!) the
bridge collapses again. |
|
|
This time
when we return to the Drawing Board, however, only the two
diagonal members on the ends of the bridge are highlighted
in red. Increase the size
of these two members by first selecting each one, and then
choosing 140 mm from the Member Size list.
|
|
 |
|
Check this new
design iteration by running the load test once more. The truck crosses
the bridge without causing a collapse. Your bridge design is successful!
|
|
|
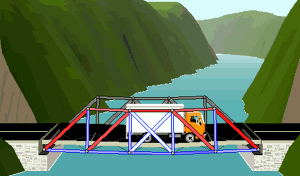
Before
we return to the Drawing Board, take a moment to watch the
Load Test Animation. Note that some of the structural members
turn red, while others
turn blue. This color
coding illustrates the type of force in each member. Members
that turn blue are experiencing
tension--they are being stretched or elongated. Members
that turn red are in compression--they
are being squashed or shortened. The intensity of color indicates
the magnitude of the member force. Thus the dark
red diagonal members are being loaded very close
to failure, while the light
blue bottom chords are much stronger than
they really need to be.
|
|
 |
|
These observations
are important, because they will help us to optimize our design.
|
|
|


